
Found a design you like or need custom guidance? We can help. Fill in the form about your project, and we’ll contact you to discuss options and answer questions.
Kitchen Pendants can shape a room’s character, but their everyday usefulness matters just as much. A fixture may look perfect online and still feel too bright, too low, or poorly placed above your island. The right choice depends on the room’s dimensions, ceiling height, work habits, and existing light. Small details matter.
Before comparing styles, measure the surface and note where people sit, prepare food, and walk. Pendant spacing should provide even coverage without blocking sightlines or creating glare. A single large shade may suit a compact table, while several smaller fixtures can balance a long island. These are starting points, not fixed rules; ceiling shape and fixture design affect the result. Check the manufacturer’s installation guidance.
Light quality deserves equal attention. Consider bulb brightness, color temperature, shade material, and dimming compatibility. Warm light can make wood and meals feel inviting, while brighter, clearer light can help with detailed kitchen tasks. Yet photographs rarely show how a finish will look in your home. It is worth checking samples in person.
This guide shares 10 Tips for Buying Kitchen Pendants, from choosing scale and placement to reviewing materials, maintenance, and installation requirements. It focuses on practical questions, not trends alone. A beautiful fixture is not automatically a useful one. Still, no checklist can predict every room. Use these tips to compare options, and consult a qualified electrician when wiring or mounting conditions are uncertain. A little measuring now can prevent an expensive mismatch later.
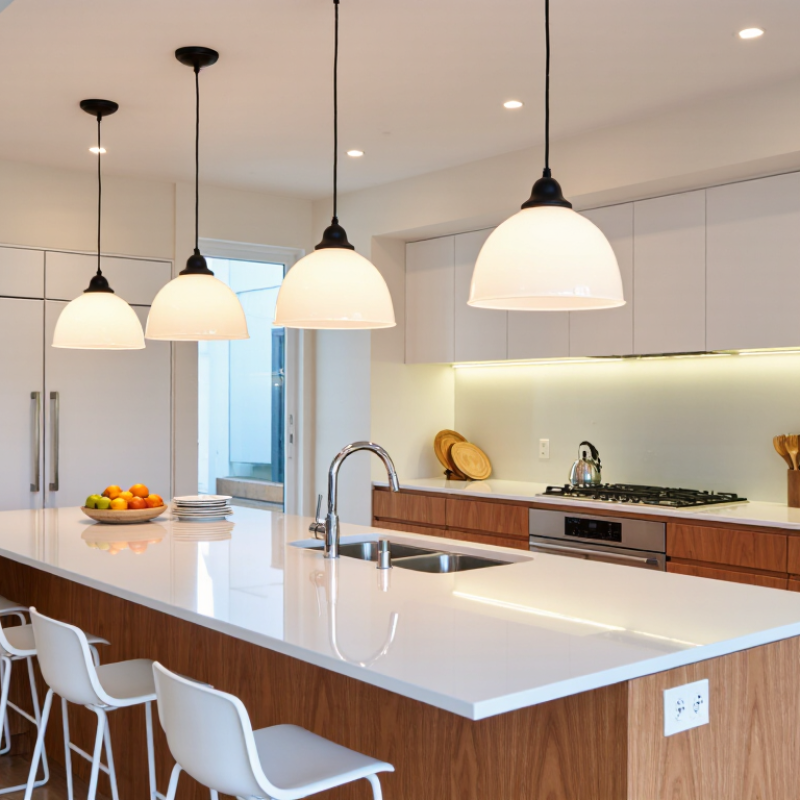
Before choosing pendant size or style, assess what your kitchen needs light for. Measure the island or table, note the ceiling height, and identify dim corners or shadows on the worktop. If you often chop vegetables beneath a cabinet, a pendant alone may not solve the problem; under-cabinet lighting may be needed too. A quick evening check can reveal where light is actually missing. Bright light matters.
For an island, center the fixtures over the usable surface, not necessarily the room. With multiple pendants, even spacing helps distribute light and keeps the arrangement balanced. Leave enough clearance so the shades do not block sightlines across the kitchen. Stand at the counter and look toward the sink and seating area before settling on a height. Small changes help. The right position depends on your ceiling, shade size, and how people use the space.
Consider how pendant light will work with existing ceiling fixtures and daylight. A clear shade can feel bright but may create glare, while an opaque shade can leave the counter dim. Dimmers offer flexibility for cooking and relaxed meals, though they do not replace useful task lighting. It is easy to focus on appearance and underestimate shadows. Test the layout with temporary markers, such as paper circles on the ceiling, then reconsider if the spacing feels crowded.
Measure the island or table before shopping, not after. Record its length, width, and ceiling height. Painter’s tape can outline a proposed fixture on the surface, helping you judge its footprint from across the room. For one pendant over a dining table, a diameter near one-third of the table’s width is a useful starting point. Over an island, compare the shade’s width with the counter and leave visual breathing room at both ends. These are guides, not rules. A broad, low fixture can feel larger than its measurements suggest.
For several pendants, mark their center points with tape and check the view from the main entrances. Divide the usable counter length evenly, while leaving about 6 to 12 inches from each end. Then adjust the spacing to suit each shade’s width; equal gaps matter more than following a fixed number. A tight row can look crowded. Above a standard-height counter, the bottom of a pendant often sits about 30 to 36 inches above the surface. Check sightlines while seated and standing, too. I’d remeasure before drilling; even a small shift can make the whole arrangement feel off.
Kitchen pendants shape a room before they even switch on. Compare silhouettes against your island: a broad dome gives focused light, while a clear-glass globe feels visually lighter. Metal shades can direct light downward; glass spreads it more widely. But clear glass exposes dust and bulbs. A quick showroom glance may not reveal that.
Tip: Compare finishes beside your cabinet sample, not under store lighting. Brushed metal softens fingerprints; polished finishes reflect more light and show smudges. Check the shade’s interior, too: white interiors often bounce light downward, while dark ones absorb more. Measure the island, ceiling height, and spacing before choosing multiple pendants. Small detail. Big difference.
Material affects upkeep and light quality, but the bulb matters too. The U.S. Department of Energy’s Energy Saver guidance says LEDs use at least 75% less energy and last up to 25 times longer than incandescent bulbs. That figure describes the light source, not every pendant’s performance. Confirm dimmer compatibility and replaceable-bulb access. Matte black can look calm against pale stone, yet may feel heavy in a small kitchen. I would test a finish sample at home, morning and evening; showroom lighting can flatter almost anything.
Tip: Check the bulb type before choosing a pendant. Some fixtures use replaceable bulbs; others have integrated light sources. Replaceable bulbs are easier to swap when brightness or color feels wrong. Check the socket and maximum wattage listed on the fixture. Small detail, big difference.
Tip: Compare brightness in lumens, not watts. Watts describe energy use, while lumens indicate light output. Over a kitchen island, several pendants may need less output each than one central fixture. Still, ceiling height, shade material, and countertop color affect the result. A dark metal shade can direct light downward but leave nearby corners dim. Color temperature matters too: around 2700–3000K feels warm, while 3500–4000K usually looks more neutral. Look at samples in your kitchen if possible. Store lighting can be misleading.
Tip: Confirm that both the bulb and dimmer are compatible. A mismatched pair may flicker, buzz, or refuse to dim smoothly. Test the lowest setting as well as full brightness; that is where problems often appear. Dimming helps shift from chopping vegetables to a relaxed dinner, but it cannot fix poor pendant placement. I once assumed a brighter bulb would solve a shadow on the counter. It didn’t—the pendant needed repositioning. Try before committing.
Use these approximate lumen ranges as a starting point for each pendant. The light you actually get depends on the shade, mounting height, and other lighting in the room.
A kitchen pendant should fit the room and the ceiling above it. Measure the island or table, then note the ceiling height and the fixture’s full drop. Over an island, keep the bottom high enough for clear sightlines and safe movement; exact spacing depends on the room and fixture. Check that the ceiling box and its support are rated for the pendant’s weight. A decorative cover cannot make a weak mounting point safe.
Installation needs more than a screwdriver. Confirm that wiring, dimmer, and bulb specifications are compatible, and follow the fixture’s instructions. Turn off power at the breaker and verify the circuit is off before any wiring work. If wiring or ceiling support is uncertain, use a qualified electrician. Do not guess. Local requirements can vary, so ask about them before work begins.
Compare the full cost, not just the fixture price. Include installation labor, mounting parts, a compatible bulb or dimmer, and possible ceiling repairs. Ask for an itemized estimate, especially if the existing box needs reinforcement. Delivery delays or an unexpected repair can change the budget. I tend to focus on the fixture’s appearance, then remember the small costs; that is an easy mistake to make. Keep a little room in the budget for them.
| # | Buying Tip | What to Check | Practical Guidance | Budget and Installation Notes |
|---|---|---|---|---|
| 1 | Measure the island or counter | Surface length and width, plus available ceiling height | Plan the pendant layout around the work surface and sightlines. For multiple fixtures, distribute them evenly and avoid placing one directly where it will obstruct a primary view. | Measuring is free; include any ceiling or cabinetry changes in the project budget. |
| 2 | Choose an appropriate hanging height | Fixture bottom-to-counter distance and the height of household members | A common starting point is 30–36 inches above an island countertop. Adjust for fixture size, ceiling height, and visibility; confirm the final position before installation. | Existing wiring may allow a simple height adjustment; moving a ceiling outlet can add electrician labor. |
| 3 | Plan spacing for multiple pendants | Fixture diameter, island length, and clearance from the island ends | Allow enough space between shades so they do not collide or crowd the surface. As a starting point, many layouts use about 24–30 inches between pendant centers, then adjust to the fixture dimensions. | More fixtures increase the cost of fixtures, bulbs, and installation. |
| 4 | Check the ceiling box and support | Box condition, wiring, mounting hardware, and fixture weight | Make sure the ceiling box is suitable for the fixture’s weight and mounting method. A qualified electrician should assess an absent, damaged, loose, or inadequately supported box. | Replacing or adding a properly supported box may require extra labor and materials. |
| 5 | Verify electrical compatibility | Supply voltage, fixture instructions, bulb type, and dimmer compatibility | Match the fixture and bulbs to the home’s electrical supply and follow the manufacturer’s installation instructions. Turn off power at the breaker before electrical work; hire a qualified electrician if unsure. | A compatible dimmer or replacement switch is an additional material and labor cost. |
| 6 | Look for a recognized safety listing | Safety certification and suitability for the intended location | Choose a fixture tested by a recognized certification body. Follow its location rating and local electrical requirements, especially if the pendant will be near a sink or another source of moisture. | Certification is not a substitute for correct installation or compliance with local code. |
| 7 | Select useful light output | Bulb brightness, color temperature, beam direction, and shade design | Consider how the pendant will work with the kitchen’s other lighting. Open or downward-facing shades can provide more task light; enclosed or opaque shades may direct less light onto the counter. | Include the cost of bulbs and any additional task lighting needed for the room. |
| 8 | Consider cleaning and durability | Shade shape, finish, exposed surfaces, and ease of access | Kitchen fixtures can collect dust and cooking residue. Choose a design that can be cleaned safely and regularly, and check care instructions before using cleaners. | Hard-to-reach fixtures may take more time to clean or require a suitable step ladder. |
| 9 | Estimate the full project cost | Fixture, bulbs, dimmer, wiring, mounting hardware, labor, and any repairs | Price the complete installation rather than the fixture alone. For a simple replacement, U.S. electrician labor may be roughly $100–$300; new wiring or difficult access can cost substantially more. | These are broad U.S. estimates, not a quote. Get a local estimate after an electrician reviews the site. |
| 10 | Confirm the installation plan before purchase | Ceiling access, switch location, installation instructions, and return policy | Check whether the existing wiring and ceiling location match the fixture’s requirements. Have electrical work completed and inspected as required by local rules. | Keep packaging and receipts until installation is complete, and budget for possible wiring or ceiling repairs. |
Cost note: Prices vary by location, fixture, ceiling access, wiring condition, and local labor rates. Obtain an itemized estimate before work begins.